
Step 1:
MSVS2008->File->New->Website(name it login)

Step 2:
In the Solution Explorer goto icon  (ASP.NET Configuration) click on it.
(ASP.NET Configuration) click on it.
In Internet Explorer or Your default browser will be open website Administration Tool

click on Security->Select Authentication Type->From the Internet->click Done(in right corner)


Step 3:
 click on Enable roles
Step 4:
 click on create & manage Roles->New Role Name(give Admin) click on add role then click on back button

Step 5:
 Create User->Fill Data eg. name,password, In the side Admin Role will be shown, if you want to give this user Admin role then click on check.

Complete->continue or back
Step 6:
Creating Access Rules->Select Directory->Rules applies to->Permission->click ok
Step 6:
Creating Access Rules->Select Directory->Rules applies to->Permission->click ok


Close Internet Explorer.
Step 7:
Step 7:
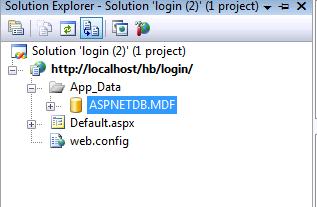
Refresh App_data folder in visual studio's Solution Explorer. then you can see a database named ASPNETDB.MDF itself created.
Step 8:
In Solution Explorer right click on localhost and click on Add new item, select Web Form from the given Templates named it login.aspx.
From Toolbox put login on aspx page(using drop down or double click) between <div>
In design page over login click on smart tag->Auto Format->Select scheme(eg. Professional)->click ok
In Properties of login->select Failure Action
1.Refresh , 2. Redirect to login page
1.Refresh , 2. Redirect to login page
select destination page url(~/default.aspx)
Step 9:
Step 9:
Login View and Login Status Login Name : put login view from toolbox to <div> and Login Status near to Login View
click on smart tag, in login view tasks ,two options will be there
1. Anonymous Template 2. Logged In Template
1. Anonymous Template 2. Logged In Template
1.select Anonymous Template then write in Login view: "You are not loggedIn"
and In Login Status tasks, select Logged Out in view of Login Status tasks.
2. select Logged In Template, write in login view: "You are logged in as", Put Login Name inside Login view and select login status tasks view as Logged In.
Note: For Logout , in login status when you will provide logout page url in the properties of login status then set Logout Action as "Redirect".
No comments:
Post a Comment