Currently I am working on NetBeans 6.9 and using Apache Tomcat 6.0 server.
Following are the steps that how to work with NetBeans 6.9 and creating your first Servlet Project(web Application).
Step 1:goto File->New Project
Step 2:Choose Project->Java Web->Web Application
click on next
Step 3:Give Name of the Project and Location of Project.
click on Next
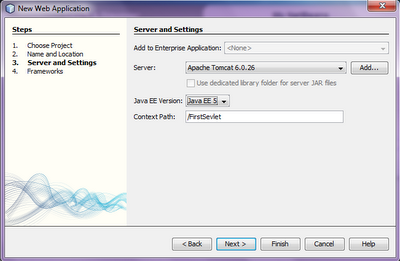
Step 4:In next Step I am using Apache Tomcat 6.0 as Server. you can choose another one if you want.
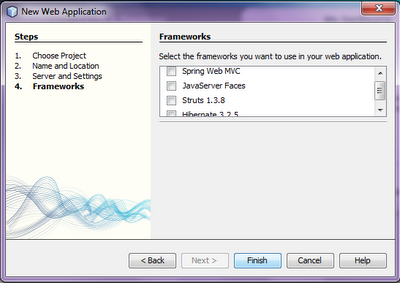
Step 5:If You want to use any Framework then select that framework and then click on Finish button.
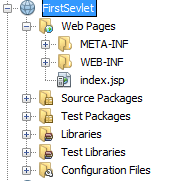
Step 6:Project Window after Adding Project
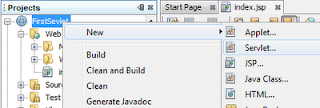
Step 7:Adding Servlet file to Project.
Right Click on Project->New->Servlet
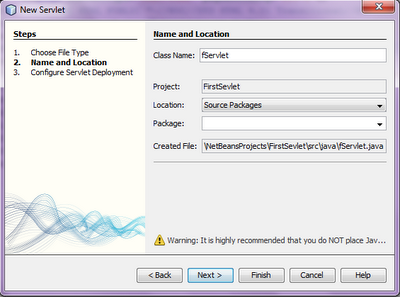
Step 8:Give Name and Location of the Servlet and click on Next
Also Read Basic Program using HttpServlet Class
Also Read Basic Login Program using JSP and GenericSevlet class
Step 7:Adding Servlet file to Project.
Right Click on Project->New->Servlet
Step 8:Give Name and Location of the Servlet and click on Next
Step 9:In Configure servlet Deployment Servlet Name and Url Pattern are already set as Class Name but you can change both here or in web.xml file present in WEB-INF folder of your project.
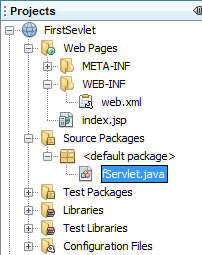
Step 10: Project in Projects Window After Adding Servlet File.
Also Read Basic Login Program using JSP and GenericSevlet class



No comments:
Post a Comment